www.lushprojects.com
Guitar Tuner for a Blind User - 2010
| This is a project I
did for a colleague at work. It's a modification of a Cherub
Guitar Mate WST-550G guitar tuner to provide an audible output to an
earpiece so a blind user can tune a guitar. |
|
| How it works I chose to modify the Cherub tuner because it uses an LED display which I thought would be easier to hack-into than the LCDs used by many of the new tuners or the analog meters used by the older tuners. Once I got the tuner I probed the LEDs and found that they had a common positive line and individual negative lines that were controlled by a dedicated chip in the tuner under the inevitable blob of plastic. To make the modification I attached a second box to the back of the Cherub tuner. In this box is an AVR ATMEGA 168 which provides the audible output. A large hole was cut between the Cherub tuner and the new box and wires run from each of the LEDs to the AVR. I also moved the battery to the new box to create space to attach the boxes and run the wires. As well as the two controls on the original tuner I also added a button which selects which string the user wants to tune. If the tuner is showing an output for a different string then no audio sound is produced. This prevents rather confusing sequences of sounds that occur if you don't put this check in. The AVR software was written in C using WinAVR and is pretty simple - poll the LEDs and then create a sound that matches the indication. |
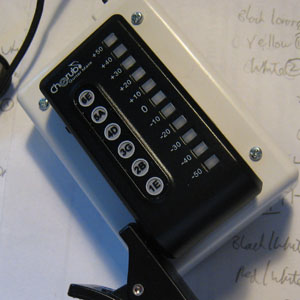 Modified
Guitar Tuner
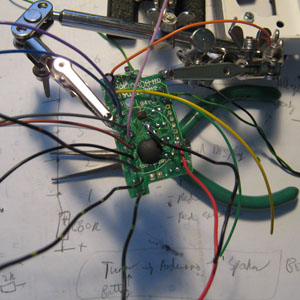 Attaching wires to the original circuit board 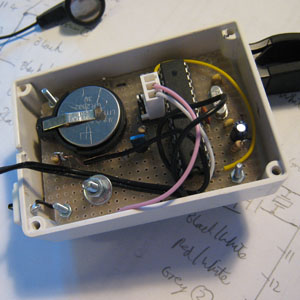 Inside the back box of the modified tuner |
| Usage
Instructions Note on directions: "Top" means the end opposite the clip. "Left" means towards the side with the clip on. "Bottom" means the direction that the clip sticks out when it is unfolded. 1) Unfold the clip from the bottom and clip it on to the head of the guitar. Insert the earpiece so you can hear the tuner. 2) Select "natural" or "flat" tuning using the sliding switch on the side of the front box. Towards the bottom is natural. Towards the top is flat. 3) Switch the device on by sliding the switch on the top of the front box to the left. The tuner will play a short up-and-down scale to show it is working. Seeing users will see the lights come on. 4) Select the string to tune using the button on the top of the back box. Each press of the button will advance the string. The string selected is indicated by playing a descending scale with the number of notes equal to the string number. String 1 is the highest note on the guitar and string 6 is the lowest. 5) Pluck the string you are tuning gently. If the string is detected by the tuner you will start to hear audio feedback on the tuning. A high pulsing note means the string is too high. A low pulsing note means the string is too low. For high and low notes the rate of pulsing indicates how close the string is to the right tuning. The faster the pulsing the closer the tuning. A middle note means it is tuned correctly. Adjust the tension in the string based on the feedback. The tuner may change its response a little so pluck the sting a few times and listen to the response. When you fairly consistently get the middle note back then the string is right. 6) If a few plucks of the string don't produce a response then the string is probably too out of tune to be picked-up by the tuner. Keep plucking and adjust the tension until you get a response. 7) Repeat for all strings 8) Once the guitar is tuned check all the strings again. 9) Switch off! Want to Make One? I made this as a favour for a friend and for a bit of interest. I am not really able to make more. I am making the circuit diagram and software available for anyone who wants to build their own version. I will not be providing any other support for builds though. This isn't a beginners project - parts of the build are difficult and the documentation is sketchy! Circuit Schematic and Build Notes WinAVR Software Files |
|
| Leave
a comment in
the guestbook. Send Iain a private message. |
|